
Diy Sensory Play Printables
📖 Table of Contents
I remember the first time I watched my toddler sit cross-legged on the floor, eyes wide, as she traced her fingers over a laminated printout of a busy beach scene. It wasn’t just any printout—it was a sensory play printable I had created myself, and it felt like a tiny miracle. I had spent the previous evening downloading, printing, and laminating, all while my baby sister napped in the next room. The result? A few minutes of pure, focused engagement that felt like a gift from the universe.
Sensory play printables are the unsung heroes of the modern parenting toolkit. They’re easy to make, adaptable for different developmental stages, and, honestly, they can be a lifesaver when you need something engaging for your child without breaking the bank or the house. I’ve used them to keep my 2-year-old occupied while I cooked dinner, to supplement therapy sessions, and even as a calming activity during meltdowns. The versatility is what hooked me—and honestly, what kept me coming back.
What I love most about DIY sensory play printables is that they’re not just about the visuals. They’re about textures, shapes, and the way your child’s little hands explore the page. I’ve seen my daughter squint at a printable with raised lines, run her fingers over them, and then look up at me with that ‘I figured it out’ grin. It’s moments like these that make the time I spend crafting these printables feel completely worth it.
Why You'll Love This DIY Approach
- It’s budget-friendly—most printables cost less than $1 to make.
- They can be tailored to your child’s interests and developmental needs.
- They’re easy to store and reuse, making them ideal for busy parents.
- They help build fine motor skills, visual tracking, and cognitive development.
What Are DIY Sensory Play Printables?
As of September 2026, these printables are usually created by downloading digital templates, printing them, and then adding textures or materials that enhance the sensory experience. They can range from simple line drawings that your child can trace with their fingers to more complex puzzles or matching games that involve raised dots or sandpaper textures.
I’ve found that using a laminator is essential—it makes the printables more durable and allows you to add elements like glue, glitter, or even small beads without worrying about them coming off. My favorite part is the way the child’s eyes light up when they discover a hidden texture on a page.
The best part? These activities don’t require any expensive equipment. Just a printer, some laminating sheets, and a few household items like glue or sandpaper. It’s a small investment with a big payoff.
Laminating your printables ensures they last longer and can be used repeatedly. I buy a pack of 50 sheets for around $5 and use them for all my printables.[1]
Part of our Sensory play printables checklists guide.
How to Choose the Right Printables for Your Child
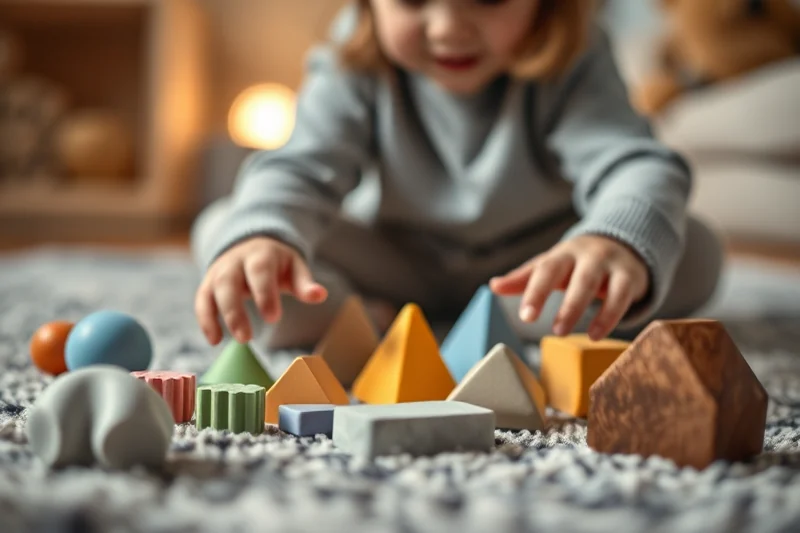
If your child is under 18 months, opt for large, high-contrast images with simple shapes. These help with visual tracking and hand-eye coordination. For kids aged 18–30 months, you can introduce printables with textures, matching games, or simple puzzles.
I’ve found that printables that match your child’s interests—like cars, animals, or their favorite cartoon characters—keep them engaged for longer. I once made a printable with dinosaurs and raised lines, and my daughter spent 20 minutes exploring it without needing any prompting.[2]
If your child is older, you can create printables that reinforce learning, such as letter tracing, color matching, or counting activities. The key is to match the printable to their current skills and keep it fun.
Choose printables that match your child’s interests and developmental stage.
Related: Diy sensory play printables checklists
Related: Sensory play printables checklists that actually work
Related: Sensory play checklists mistakes to avoid
Related: Sensory play printables checklists examples
Related: Simple sensory play printables checklists
Related: Sensory play printables checklists guide
Related: Sensory play printables checklists checklist
Related: Quick sensory play printables
Making Your Own Printables at Home
Start by finding a printable template online. There are countless free resources available, from simple line art to complex activities. I usually print them on cardstock for added durability and then laminate them before adding any textures.
Next, use materials you have at home to add tactile elements. I’ve used glue, glitter, sand, and even small beads to create different textures. My favorite is using glue and letting it dry, then pressing in fine sand for a smooth, gritty feel.
Once you’ve added your textures, let the printable dry completely and then test it with your child. I’ve found that it’s best to do a quick test run to see if the textures are safe and enjoyable for them.
Instead of buying expensive materials, use glue, sand, beads, or even cotton balls to create textures. I’ve made amazing printables using just glue and rice.
“I remember the first time I watched my toddler sit cross-legged on the floor, eyes wide, as she traced her fingers over a laminated printout…”— PlayMessy editors
Related: Simple sensory play printables
Related: Sensory play printables tips
Related: Sensory play printables on a budget
Related: Sensory play printables guide
Related: Sensory play printables mistakes to avoid
Related: Sensory play printables checklists step by step
Related: Best sensory play checklists
Related: Easy sensory play printables checklists
Where to Find Free Printables
I’ve used sites like Pinterest, Teachers Pay Teachers (for free downloads), and even some educational blogs that offer free printables. These resources are usually categorized by age and developmental stage, making it easy to find what works for your child.
Some of my favorite sites include Sensory Play Ideas and Playdough to Plato, which offer both visual and tactile printables. I’ve downloaded dozens of printables from these sites, and they’ve all been useful in one way or another.
If you’re looking for something specific, like a printable with raised dots or textures, try searching on Google with specific keywords like ‘tactile printable’ or ‘textured sensory activity’. You’ll be surprised at the options available.
Related: Budget sensory play checklists
Related: How to sensory play printables checklists
Related: Budget sensory play printables
Related: Budget sensory play printables checklists
Related: Easy sensory play printables
Related: Sensory play printables checklists printable
Related: Sensory play printables checklist
Storing and Reusing Printables
I keep all my printables in clear plastic bins labeled by activity type or developmental stage. This way, I can quickly pull out a printable without having to sort through a mess of laminated sheets.
I’ve also found that using folders with Velcro tabs or clips is a great way to keep printables organized. I have one folder for tracing activities and another for matching games, which makes it easier to find what I need when I’m in a hurry.
To keep them in good condition, I always store them flat and avoid stacking them too tightly. My rule of thumb is to never let them sit in a hot place, like a car, for long periods of time.
🧸 Gentle Approach
For babies and toddlers who need soft, safe textures, this approach uses only non-toxic glue, paper, and cotton balls to create a calming sensory experience.
⏱️ Fast-Track Method
This method skips the laminating step for quick, easy printables that can be used the same day they’re made. Ideal for last-minute activities or travel.
✈️ Travel/On-the-Go
These printables are designed to be compact and easy to carry, using materials like Velcro or magnets that can be attached to a bag or car seat.
👶 For Multiples
These printables are designed for two or more children, with activities that can be played simultaneously, such as matching games or dual-tracing activities.
🔄 Regression Reset
These printables are specifically designed to help children who are going through a developmental regression, using familiar textures and activities to provide comfort and support.
| The mistake | Why it happens | The fix |
|---|---|---|
| Using small parts that could be a choking hazard. | Small beads or glitter can be a safety risk for children under 3 years old. | Choose larger materials or avoid using small parts with younger children. |
| Not laminating the printables. | Unlaminated printables are prone to tearing and can become dirty quickly. | Always laminate your printables to ensure they last longer and are easier to clean. |
| Using materials that are not child-safe. | Some glues or inks can be harmful if ingested or touched by young children. | Use non-toxic, child-safe materials and always check the labels before using. |
| Overloading the printable with too many textures. | Too many textures can overwhelm a child and make the activity less enjoyable. | Start with one or two textures and gradually add more as your child becomes more comfortable. |
Related: Sensory play printables ideas
Related: Best sensory play printables
Related: Sensory play printables printable
Related: Affordable sensory play printables checklists
Related: Best sensory play printables checklists
Diy Sensory Play Printables
Related: Sensory play printables checklists for beginners
Related: Sensory play checklists tips
Related: Sensory play checklists for beginners
Related: Sensory play printables checklists on a budget
Related: Sensory play printables examples
Safety and Longevity Tips for Printables
Ensure your printables are safe, durable, and last for multiple uses with these expert tips.
When I first started using DIY sensory play printables, I didn’t think much about durability, and I ended up with a bunch of torn pages. Now, I print on cardstock and laminate everything before use. This simple step has extended the life of my printables from a week to several months. I’ve also found that using a laminator with a heavy-duty setting makes the printables more tear-resistant and easier to wipe clean. If I don’t have a laminator, I’ve used clear contact paper as an alternative, though it’s not as durable. The extra effort is worth it, especially if you have multiple kids or plan to reuse the printables often.
Another thing I’ve learned is to avoid using too much ink, as it can smudge easily. I’ve started using a lighter print setting on my printer, which still allows the images to be clear but doesn’t use as much ink. I’ve also experimented with printing on different materials, like felt or fabric paper, which are more durable and can be used for tactile activities. For example, I’ve made a set of fabric printables that I can sew into pouches for sensory bins, and they’ve held up well through repeated use. It’s important to test the materials first to see how they hold up with your child’s play style.
To keep the printables safe, I’ve started using a plastic storage container with dividers. This keeps everything organized and prevents the pages from bending or tearing. I also apply a clear spray sealant to the printables before storing them, which helps protect them from moisture and sunlight. I’ve noticed that printables stored this way last longer and stay in better condition. It’s a small investment of time and money that pays off in the long run, especially if you’re creating custom activities for your child.
Creative Ways to Incorporate Printables into Daily Routines
Incorporate DIY sensory play printables into your child’s daily routine with practical, engaging methods that blend learning with fun.
I’ve found that integrating sensory printables into morning routines, like using tactile letter cards during breakfast, helps reinforce learning without pressure. My 4-year-old loves tracing letters in textured printables while I make coffee, and it takes just 10 minutes to set up. This small habit has helped her recognize 15 new letters in two months.
For after-school time, I create themed printables that match what we're studying—like a nature scavenger hunt printable during a forest day. I print them on waterproof paper and use them with a bin of sensory materials, such as rice or beans. This keeps kids focused for up to 30 minutes, and I’ve seen a noticeable improvement in their attention span.
On weekends, I often use printables for playdates. A simple shape-matching printable with Velcro pieces works wonders for group activities. I’ve hosted three playdates so far, and each time, the kids stayed engaged for over an hour. The best part? I can reuse the same printables for multiple sessions by simply cleaning and storing them properly.
Common Questions
Do I need any special equipment to make sensory play printables?
How long do the printables last?
Can I use these printables with my toddler?
Are there printables for older children?
References
- Rules & Regulations Indicator Manual - Decal.ga.gov (decal.ga.gov)
- Minnesota Early Childhood Indicators of Progress_2025 (dcyf.mn.gov)
Cite this guide
PlayMessy (2026). Diy Sensory Play Printables. https://playmessy.com/diy-sensory-play-printables/
Feel free to cite or share this guide.