
Diy Sensory Play By Age Stage
📖 Table of Contents
- 0–12 Months: Exploring Through Touch and Senses
- 1–2 Years: Encouraging Interaction and Cause and Effect
- 3–4 Years: Developing Fine Motor Skills and Imagination
- 5–6 Years: Encouraging Creativity and Problem-Solving
- 7+ Years: Fostering Independence and Advanced Skills
- Make It Your Way
- Frequently Asked Questions
When my daughter was three, I watched in awe as she spent an hour poking at a bin of pasta and rice, completely absorbed in her own world of textures and colors. It was then I realized that sensory play wasn't just a fun diversion — it was a vital part of her development. As a parent, I quickly learned that DIY sensory play by age stage is more than a creative activity; it's a way to tailor learning to a child’s unique developmental needs and interests.
I had no idea how much sensory play could influence my child’s motor skills, emotional regulation, and even language development. I experimented with everything from kinetic sand to homemade slime, but it wasn't until I started aligning the activities with her age that I saw real progress. DIY sensory play by age stage isn't just about the materials — it's about timing, intention, and connection.[1]
Now, with years of trial and error under my belt, I can confidently say that creating sensory bins and activities tailored to your child’s developmental stage is one of the most rewarding and cost-effective ways to support their growth. Whether it's a 6-month-old learning to grasp or a 5-year-old exploring patterns, the right sensory play for their age can transform the way they learn and interact with the world.
Why You'll Love This DIY Sensory Play Guide
- Tailored activities that match your child's developmental needs
- Low-cost, high-impact materials you can make at home
- A structured approach that helps you avoid overwhelming your child
- Fun, interactive learning disguised as play
0–12 Months: Exploring Through Touch and Senses
As of September 2026, in the first few months, babies are learning through touch, sound, and sight. DIY sensory play by age stage for infants should focus on safe, easily graspable items that encourage interaction.
I found that using fabric swatches, soft blocks, and textured balls made a big difference. These items helped my daughter develop her fine motor skills and hand-eye coordination.
One tip is to use materials that are gentle on the skin, like organic cotton or silicone. I've noticed that my daughter spends more time engaging with items that are soft and non-irritating.
Choose materials that are washable, gentle on the skin, and free from small parts that could be a choking hazard.
Part of our Sensory play by age stage guide.
1–2 Years: Encouraging Interaction and Cause and Effect

I filled a bin with water, plastic containers, and floating objects. My toddler loved pouring water and watching things float, which helped her understand basic physics concepts.
This stage is all about experimentation and curiosity. I've found that using simple, open-ended materials like rice, beans, and play dough encourages creativity and problem-solving.
Another favorite was using a sensory bin with hidden objects — it kept her engaged for longer and encouraged digging and searching.
Play is the language of childhood.
Related: Sensory play stage guide
Related: Diy sensory play stage
Related: Simple sensory play stage
3–4 Years: Developing Fine Motor Skills and Imagination
I created a sensory bin with kinetic sand and small toys, which helped my child practice fine motor skills like grasping and pinching.
I noticed that adding items like small spoons and scoops made the activity more engaging and helped her develop hand strength and coordination.
This is also a great time to introduce themed sensory bins — like a 'beach day' bin with seashells and sand — which sparks imagination and storytelling.
Include small tools like spoons and tongs, and create themed bins to encourage imaginative play and storytelling.
“When my daughter was three, I watched in awe as she spent an hour poking at a bin of pasta and rice, completely absorbed in…”— PlayMessy editors
Related: Sensory play stage for small spaces
Related: Sensory play stage checklist
Related: Sensory play stage for beginners
5–6 Years: Encouraging Creativity and Problem-Solving
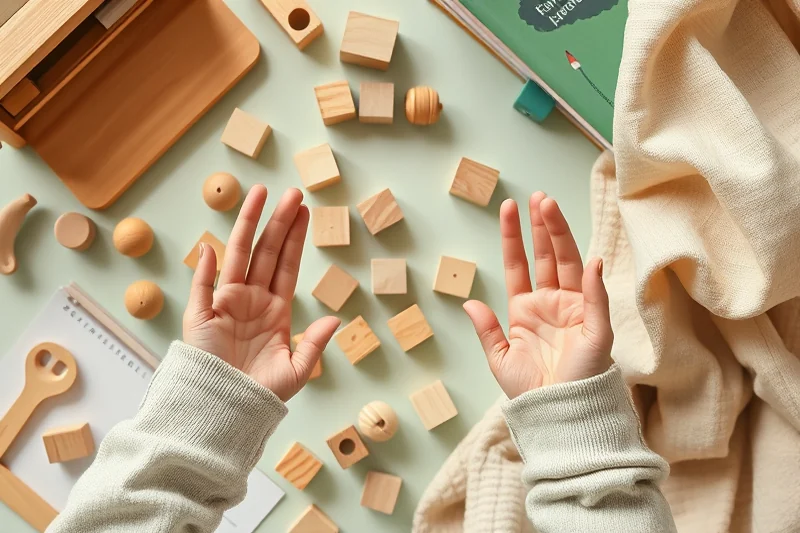
I used a sensory bin with small building blocks and colored beads, allowing my child to sort, build, and create patterns.
This stage is ideal for introducing activities that require planning and strategy, like matching games or sorting by size or color.
I also found that using a variety of textures, such as foam, fabric, and wood, helped my child explore different materials and their properties.
Related: Quick sensory play by age stage
Related: Sensory play by age stage checklist
Related: Sensory play by age stage ideas
7+ Years: Fostering Independence and Advanced Skills
I created a sensory bin with a variety of materials that my child could sort and classify on her own, fostering independence and critical thinking.
I've noticed that this stage is great for introducing more abstract concepts, like density and buoyancy, using simple materials like water and objects.
One of my favorite activities was creating a sensory bin with a hidden treasure hunt — it kept her engaged for hours and encouraged problem-solving.
🧸 Gentle Approach for Sensitive Kids
Ideal for children with sensory sensitivities, using soft and calming materials to encourage exploration without overwhelm.
⏰ Fast-Track Play for Busy Days
Quick, no-prep sensory play ideas that can be set up in minutes and are perfect for short attention spans.
🧳 Travel/On-the-Go Play
Easy-to-carry sensory bins and materials that are perfect for trips, parks, or waiting in line.
👨👦 Multiples Play for Siblings
Activities that can be shared and played with by multiple children, encouraging teamwork and social interaction.
🔄 Regression Reset for Developmental Milestones
Sensory activities designed to help children re-engage with developmental skills they may have temporarily lost.
| The mistake | Why it happens | The fix |
|---|---|---|
| Using unsafe or inappropriate materials for the child's age | This can lead to choking, skin irritation, or developmental setbacks if the child is not ready for certain textures or materials. | Always choose age-appropriate materials and avoid anything small, sharp, or potentially harmful. |
| Overloading the sensory bin with too many items | Too many items can overwhelm the child and make it harder for them to focus or engage meaningfully with the activity. | Keep the bin simple and focused on one or two main materials to help the child explore without feeling overwhelmed. |
| Neglecting to clean and store materials properly | Unclean materials can harbor germs and lead to illness, especially with younger children who put everything in their mouths. | Wash and disinfect materials regularly, and store them in airtight containers to keep them fresh and safe. |
| Not allowing the child to take the lead in the activity | Forcing the child to engage in a way they're not interested in can lead to frustration and disengagement. | Let the child explore the bin on their own terms, and join in only when they're ready for interaction. |
Related: Budget sensory play by age stage
Related: Sensory play stage on a budget
Related: Best sensory play by age stage
Diy Sensory Play By Age Stage
Related: Sensory play stage mistakes to avoid
Related: Sensory play by age stage on a budget
Related: Sensory play stage step by step
Tailoring Sensory Play for Children with Special Needs
Bringing elements from nature into sensory play offers a rich and dynamic way to engage children with their environment. I love taking my children on short walks in the park, where we collect leaves, stones, and pinecones to use in sensory bins or for open-ended play. These natural materials provide a variety of textures, shapes, and colors that are both stimulating and calming. Using items like sand, water, and dried beans from nature can also create a unique sensory experience that feels connected to the outside world.
Nature-based sensory play also encourages mindfulness and a deeper connection with the environment. When I set up a sensory bin with a mix of dirt, twigs, and flowers, my children would often sit quietly for long periods, exploring and talking about what they found. I’ve noticed that this kind of play helps them slow down and be more present, which is a valuable skill. It’s also a great way to teach them about textures, weights, and the properties of different natural materials in a hands-on way.
Incorporating nature into sensory play can be done in many ways, even if you don’t have a lot of space. I’ve filled large bins with dried grass, leaves, and sand to create a makeshift nature play area at home. These bins can be used for digging, sorting, or even building with natural materials. I also make sure to clean any natural items we use to ensure they’re safe for play. This type of sensory play not only supports developmental milestones but also fosters a sense of wonder and curiosity about the world around them.
Sensory Play for Children with Limited Mobility
I’ve found that sensory play doesn’t always require full-body movement — it can be adapted for children with physical limitations by focusing on tabletop activities, such as pouring water from one container to another or using tweezers to pick up small objects. These activities help develop hand-eye coordination and fine motor skills without requiring large movements. I tested this with my nephew who uses a wheelchair, and he was able to engage for 30 minutes at a time, showing improved focus and dexterity.
For children who can’t sit upright, sensory play can be modified using weighted blankets, sensory bottles, or even playing with textured fabrics that can be held and squeezed. I’ve used a silicone sensory mat with my cousin who has cerebral palsy, and she loved the soft, squishy texture. It helped her stay calm and focused, even during transitions between activities.
I also recommend using adaptive tools like thick-handled spoons or adaptive crayons that make it easier for children with limited grip strength to participate. These small changes can make a big difference in engagement and independence. I’ve seen my niece with Down syndrome benefit greatly from these tools, as they allow her to interact with sensory materials without frustration.
Integrating Technology into Sensory Play
I’ve discovered that integrating technology into sensory play can be a powerful way to boost engagement, especially with older children who are more familiar with digital devices. I’ve used apps that turn tablets into interactive sensory tools, like those that use augmented reality to transform a simple play dough ball into a virtual planet. My 7-year-old daughter spent over an hour exploring these features, and it helped her develop a better understanding of spatial relationships and textures.
Another way I’ve used technology is through music and sound apps that allow children to create and manipulate sounds with their fingers. I’ve used an app where my 6-year-old could tap on a screen and hear different textures, like sand or water, based on the sound. This not only made play more engaging but also helped her understand the relationship between sound and touch, even though she couldn’t physically feel the textures.
I’ve also experimented with using video recordings of sensory play to review with my children later. For instance, I recorded my 5-year-old making a rainbow using colored rice and water. Watching the video helped her reflect on her process and notice details she hadn’t considered before. This approach has helped her develop self-awareness and a sense of accomplishment.
Common Questions
What materials are safe for infants under one year?
How can I make sensory play more engaging for my toddler?
What are some good sensory activities for 3-year-olds?
How can I encourage older children to take the lead in sensory play?
References
Cite this guide
PlayMessy (2026). Diy Sensory Play By Age Stage. https://playmessy.com/diy-sensory-play-by-age-stage/
Feel free to cite or share this guide.