
Budget Sensory Play Activities
📖 Table of Contents
- DIY Sensory Bins: Affordable and Educational
- Natural Sensory Play: Bringing the Outdoors In
- Recycled Materials: Turning Trash into Treasure
- Kitchen-Based Sensory Play: Fun with Food and Materials
- Water Play: Cooling Down with Affordability
- Make It Your Way
- Frequently Asked Questions
- The Printable Activity Plan
The first time my toddler grabbed a handful of dried beans and poured them into a jar, I realized how powerful sensory play could be — not just for learning, but for joy. I was on a tight budget, and I had no idea how much fun could come from simple, everyday materials. It wasn’t until I started collecting items from the kitchen, garage, and even our local dollar store that I saw just how much potential was hiding in plain sight. And that’s exactly what this article is about: budget sensory play activities that don’t require a trip to the mall or an empty bank account.[2]
Sensory play isn’t a luxury; it’s a learning tool that can be found in the most unexpected places. Whether you're looking to help your child develop fine motor skills, enhance cognitive abilities, or simply create a space for exploration, the right materials don’t have to break the bank. I’ve spent the last year experimenting with everything from rice and flour to recycled items and natural elements. What I’ve learned is that the most effective sensory play activities are often the ones that use what you already have, with a little bit of creativity.
This guide is the culmination of that journey — a collection of tried and true budget sensory play activities that have worked in my home and the homes of parents I've spoken with. I’m not here to sell you expensive kits or fancy products. I’m here to show you that with a little imagination and a few simple items, you can create engaging, educational, and deeply satisfying sensory experiences for your child. Let’s dive in.
Why You'll Love This Guide to Budget Sensory Play Activities
- Discover how to create rich sensory experiences without spending a fortune.
- Learn to repurpose everyday household items into engaging learning tools.
- Explore activities that are both educational and fun for your child.
- Get practical, step-by-step instructions that are easy to follow.
DIY Sensory Bins: Affordable and Educational
As of August 2026, Sensory bins are one of the easiest and most cost-effective ways to create a hands-on learning experience. I filled a large plastic bin with dried beans, rice, or even shredded paper, and added scoops, funnels, and small toys for my toddler to explore. The best part? I didn’t have to buy a single specialized toy or material for this — it was all stuff I had at home.
My son loved digging through the bin, sorting the items, and transferring them from one container to another. It helped improve his fine motor skills, hand-eye coordination, and even his understanding of cause and effect. I’ve seen similar results in other parents who’ve used sensory bins, even when they’ve used items like pasta, cereal, or even dirt from the backyard.
One of the best parts of making your own sensory bin is the ability to customize it for your child’s interests. Whether it’s a bin filled with water and floating toys, sand and small buckets, or even a bin with dried pasta and food coloring, the possibilities are endless. And the best part is that these bins can be reused, washed, and refilled time and time again.
Fill your sensory bin with items that match your child’s current interests. If they love cars, add toy vehicles and make a road with paper. If they’re into animals, include small figurines and create a pretend jungle or farm.
Part of our Sensory play guide.
Natural Sensory Play: Bringing the Outdoors In

There’s something about the texture of a leaf, the smell of soil, or the feel of a smooth stone that can’t be replicated in a typical toy. I’ve taken my children on several nature walks and collected items like pinecones, rocks, leaves, and even fallen branches to bring into the house for sensory exploration.
We’ve made nature bins using these collected items, and the kids love touching and sorting them. It’s a great way to teach them about the environment, introduce them to different textures and smells, and even help them develop their vocabulary as they describe what they’re feeling and seeing.
One of the best things about natural sensory play is that it doesn’t require any special equipment. Just take a walk, collect a few items, and let your child explore. I’ve found that even the most basic natural materials can be incredibly engaging for young children.
Nature is the best sensory teacher — it’s free, it’s everywhere, and it’s full of wonder.
Related: Sensory play for beginners ideas
Related: Diy sensory play for 2 year olds
Related: Sensory play for kids explained
Related: Simple play based learning definition
Related: Minimalist Sensory Play Activities
Related: Sensory Play Budget Printable
Related: Sensory Play Stage On A Budget
Related: Budget Sensory Play Schedules
Related: Affordable Sensory Play Budget
Related: Budget Sensory Play Rainy
Recycled Materials: Turning Trash into Treasure
I’ve been using recycled materials for sensory play for years now, and it’s one of my favorite ways to keep costs low while still providing a rich learning experience. Things like cardboard tubes, egg cartons, bottle caps, and even old fabric scraps can be transformed into educational tools.
One of my favorite projects was making a sensory play activity out of old tissue paper, glue, and a cardboard box. I cut the cardboard into squares and had my child glue different textures of tissue paper onto them. It was a great way to teach about different textures and colors, and we even made a little collage that hung on the wall.
Using recycled materials is a great way to be environmentally friendly while still engaging your child’s senses. Plus, it’s a great conversation starter about how we can reduce waste and reuse items in creative ways.
Collect different textures from around the house — sandpaper, felt, plastic, fabric, and foil — and glue them onto a piece of cardboard. This makes a great sensory board for your child to touch and explore different surfaces.
“The first time my toddler grabbed a handful of dried beans and poured them into a jar, I realized how powerful sensory play could be…”— PlayMessy editors
Kitchen-Based Sensory Play: Fun with Food and Materials
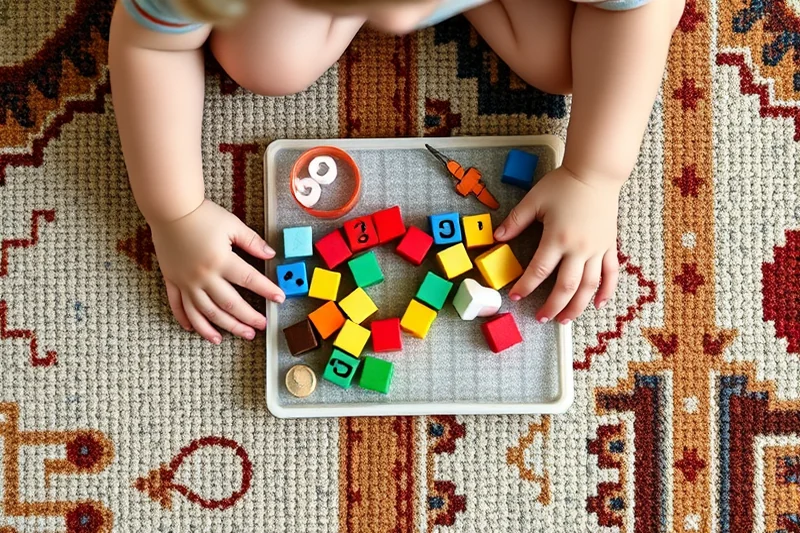
I’ve used everything from flour and water to cornstarch and glue to create sensory play activities that are both educational and fun. One of my favorites was making a homemade playdough using flour, salt, oil, and food coloring. It was easy, it didn’t cost much, and my child loved playing with it for hours.
Other kitchen-based sensory activities include filling containers with different types of grains, like oats, rice, and lentils, and letting your child sort them by color or texture. I’ve also used yogurt, honey, and even oatmeal to create messy, but highly engaging sensory experiences that are both fun and a little messy.
The best part about kitchen-based sensory play is that it’s usually safe, as long as you’re careful with ingredients. And the fact that these activities can be cleaned up easily makes them ideal for younger children who are still learning about mess and clean-up.
Mix oatmeal and yogurt in a bowl and let your child explore the texture with their hands. It’s a great way to teach them about different consistencies and it’s easy to clean up with a damp cloth.
Water Play: Cooling Down with Affordability
I’ve used water play as a way to keep my child cool during the summer and as a sensory activity that helps develop their fine motor skills. All I needed was a few plastic containers, a watering can, and a small pool or even a shallow tray filled with water.
We’ve done activities like filling containers with water and letting the child pour it from one to another, using funnels and small cups. It was a great way to teach them about volume, capacity, and even cause and effect. I’ve also seen similar activities done with water and food coloring, which made the water more visually engaging for the kids.
One of the best things about water play is that it’s a great way to cool off during hot days, and it can be done just about anywhere. Whether it’s in the backyard, on the patio, or even inside the house, water play can be both educational and fun for your child.
⭐ Classic
The original DIY playdough recipe with just flour, salt, oil, and water.
💰 Budget
A simplified version of the recipe that uses less oil and no food coloring for a lower cost.
⚡ Extra-Fast
A quicker version of the recipe that skips kneading and is ready in under 10 minutes.
✨ Depth
A version of the recipe that includes additional ingredients for more sensory exploration, like glitter or sand.
🥗 Light
A lighter, gluten-free version of the recipe made with alternative flours for those with dietary restrictions.
| The mistake | Why it happens | The fix |
|---|---|---|
| Using too much oil in the playdough. | Using too much oil can make the playdough too sticky and difficult to work with. It can also make the playdough feel greasy and less pleasant to touch. | Use a small amount of oil and mix it thoroughly into the flour and salt before adding the water. If the playdough is too sticky, you can add a little more flour to adjust the texture. |
| Skipping the kneading step. | Kneading the dough is essential for creating a smooth and elastic texture. If you skip this step, the playdough may be too dry and crumbly to use effectively. | Take the time to knead the dough for at least 5 minutes on a floured surface. This will help ensure that the playdough is pliable and easy to work with. |
| Adding too much food coloring at once. | Adding too much food coloring at once can make the dough too colorful and difficult to handle. It can also affect the texture of the playd面向. |
What You'll Need tap to check off
- 1 lb all-purpose flour
- ½ cup salt
- 1 tablespoon vegetable oil
- 1 tablespoon water
- ½ cup food coloring (optional)
Method tap a step when done
- In a large mixing bowl, combine the flour and salt.
- Add the vegetable oil and water to the bowl and mix until a dough forms.
- Knead the dough on a floured surface for about 5 minutes until it becomes smooth and elastic.
- If using food coloring, divide the dough into portions and add a few drops of coloring to each portion. Knead until the color is evenly distributed.
- Store the playdough in an airtight container or plastic bag for up to a week.
- Once ready, let your child play with the playdough, encouraging them to roll, flatten, and shape it into different forms.
Key Facts
Budget Sensory Play Activities
Common Questions
Can I use any type of flour for this playdough?
How long does homemade playdough last?
Can I add other ingredients to the playdough for extra sensory experiences?
Is this playdough safe for young children?
References
- Efficacy of Sensory Interventions on School Participation of Children ... (pmc.ncbi.nlm.nih.gov)
- Play with your food! Sensory play is associated with tasting of fruits ... (sciencedirect.com)
Cite this guide
PlayMessy (2026). Budget Sensory Play Activities. https://playmessy.com/budget-sensory-play-activities/
Feel free to cite or share this guide.